Monday, July 30, 2012

Meatless Monday: Frozen Tahini-Banana Bites

Every so often I stumble across a recipe that gets me really excited. The requirements for such excitement usually are:
  • unusual prepartation or ingredients
  • uses ingredients in a way I never thought of
  • is not only delicious, but also healthy!  

And I get especially excited when it's an easy-to-make dessert that is sugar-free and I just so happen to have all the ingredients readily available! 

I came across the recipe for Frozen Yogurt Tahini Banana Cups (what a mouthful!) via Simple Living with Diane Balch (currently my favorite food blog, I might add!) when Fox in the Kitchen linked it up onto the Foodie Friday blog hop. Fox in the Kitchen has a wealth of awesome recipes on her blog, so do check her out, and she based the recipe off of the vegan version from The Veggie Nook (lots of good stuff there, too!). And she got the recipe from Sketch-Free Eating, a blog that has many amazing raw-based recipes, and they got it from...somewhere. I couldn't find the original recipe on their blog, they have way too much amazingness on there that easily distracts me...

SO, with all that being said, you know this recipe has to be awesome if so many people felt the need to keep passing it on! I made a batch for a Sunday afternoon gathering, and I'm sorry to say they did not go over as well as I'd hoped, although I found them to be so yummy and delicious that I ate half the batch myself. They are lightly sweetened and just melt in your mouth! Not everyone is as enthusiatic about healthy-eating as I am. That's why I am so grateful for my blogging community that can appreciate recipes like these, at least I hope so...

I had the cute Disney cupcake liners left over from Lily's 2nd birthday party :)

Frozen Tahini-Banana Bites
(this is the exact recipe from Fox in the Kitchen, but I just think that title is less of a mouthful!)

Ingredients:

1/2 cup of cold-pressed coconut oil
1/2 cup tahini
1-2 ripe banana
1/2 cup plain regular or Greek yogurt 
4 tbsp honey or agave (you can use less, but I thought this was the perfect amount)
1 tbsp raw sesame seeds
Pinch of sea salt
24 blueberries+ for topping (optional)
24 cupcake liners 

Note: the recipe from Fox in the Kitchen says this makes 2 dozen, but I was only able to make half of that with this amount. Perhaps I used too much batter per cupcake cup, or perhaps I just used larger-sized cupcake cups than she did, but if you want to make the full 24, I suggest not to be too generous with filling each cup with the mix.

What I used

Combine the coconut oil, salt, honey or agave, and tahini in a small bowl; it will work better if the tahini and coconut oil are softened or melted. Next, add the yogurt until well-combined. Slice the banana(s) into 24 slices. Spoon some of the mixture into each cupcake liner, then place a piece of sliced banana on top, sprinkled with some of the sesame seeds. Place cupcake cups on tray in freezer and freeze until batter is set, for about 5 or so minutes.

The batter
After first freezing phase

Take the tray out of the freezer then spoon the rest of the batter on top. Sprinkle with sesame seeds and then place tray back into freezer. Allow treats to freeze for at least one hour before serving.

Now, to "add a little something", I placed a single, fat blueberry on top of each treat to make it look a little more appealing. I think they came out cuter-looking that way, and you can of course get even more creative with whatever you choose.  


Another thing I did to make things more fun was to put blueberries in the middle of one of the treats for one of the kids to find. Whoever got the treat with the blueberries in the middle won a prize! (In this case, my friend's daughter found them and she won a word card game. She was very pleased with this:). 

After taking my first bite, I thought of so many other creative ways you can mix this recipe up. Here are some suggestions:
  • use peanut or almond butter in place of tahini
  • add raw carob or chocolate shavings as topping
  • add extra fruit to the middle or top
  • mix chocolate, vanilla, almond, etc. flavoring into batter
  • put jelly in the middle

I am going to try and make them with peanut butter and chocolate next time! They may go over better with the pickier eaters in my life that way. Plus, how can such a flavor combination go wrong?

The general consensus of this recipe among my family and guests was:

Friend 1: "Good, but weird."
Friend 2: "Tastes like halvah; could use more banana."
Daughter of friend 1: "No thanks." (she's vegan)
Daughter of friend 2: "Yum." (she found the blueberries)
Lily: peeled off the banana and left the rest
Paul: "Yuck!"
Me: "Yum, yum, yum, I'll eat the rest!"

I hope the mixed response does not deter you from trying this if you're curious and especially if you're passionate about raw food and healthy eating. This is super-easy and cheap to make and definitely a much better alternative to store-brought popsicles and ice cream. 

Tahini is an incredibly tasty and versatile ingredient that I don't think is used much at all in the western world. It is a very popular condiment and ingredient in parts of Africa and the Middle East, used as a sauce in many yummy dishes. Tahini is essentially sesame paste; when mixed with water and a little salt, if makes a salty, nutty sauce that can be used as a topping on things like tofu, chicken and vegetables, or as a great salad dressing. This is the first time I've seen it used in a dessert other than Halvah. If you don't know what Halvah is, it is like a Turkish candy bar (pictured below). 

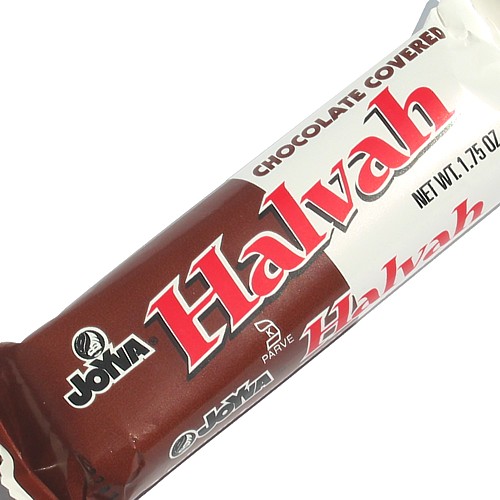
Halvah can also refer to any sweet, dense sesame seed treat, but this is the most recognized and commercial version in the West

Sesame seeds contain an abundance of vitamins and minerals such as copper, manganese, calcium, iron and vitamin B1, plus much more! That's a lot for such a small seed. These nutrients can help heal and prevent ailments such as arthritis, colon cancer, and osteoperosis. They also help to lower cholesterol and support bone health.

Have a happy Meatless Monday and do let me know if you try this unique recipe, and also if you decide to pass it on as well :)


Friday, July 27, 2012

Sweet Saturday will be back next week!

So sorry to cancel the party today :( I was having internet issues that lasted until this morning, and don't have the time right now to write up a post and promote it, so I will have to cancel for this weekend. I am also having family and friends over this weekend, so I don't think I'll be able to squeeze in any time to make it up then either...

I apologize if you were looking forward to this, but I will promise to make next week count! Until then, check out my other recent posts and this sweet pic of Lily below. Have a great weekend!

Future artist :)

Thursday, July 26, 2012

Up-and-Coming Blog of the Month!

I haven't blogged about another blog since May (how did that happen?), and decided I'd better get crackin'! I have been introduced to SO MANY awesome new blogs recently so it was hard to choose, but after seeing one tasty and creative post after another from Linda at With a Blast, I just had to spread the awesomeness of her blog around.


Ever since I started being more committed to hosting a Sweet Saturday linky every week, Linda has been there linking up many many amazing recipes and craft ideas that are often just too good to be true. Her most recent recipe is for Red Wine Cream. Yes, you read that right, are you drooling yet? Another recent favorite of mine was this how-to for Nutella Cheesecake Cellphones. And, yes, you read that right too! How does she come up with this stuff?


I also loved this elegant and simple idea for Appetizers on a Stick, but the first post I read from her that I knew was going to have me hooked on her blog as long as she was writing it was this recipe for Coffee Jell-O Cubes. I mean, omg! How creative and genius! I really think she and Martha Stewart should team up...


Coffee-flavored Jell-o...where have you been all my life?


Unfortunately, right after I wrote the draft for this post, Linda notified me that she was going to have to stop blogging because she just doesn't have the time to keep up with it anymore. She said the blog will still be up and active for viewing, but no longer updated. You can imagine my sadness at hearing this news, so this post is not only about promoting With a Blast, but also a goodbye to what was set to become a blog that was going to get better and better. Farewell :(

I have some blogs in mind for the next Up-and-Coming Blog of the Month, but if you would like to nominate one, please do so in the comments. The only requirements are that the blog has 200 or less GFC followers, is continuously updated, and has to do with parenting, health, crafts, cooking, and/or creativity. 


Tuesday, July 24, 2012

Meatless Monday on Tuesday: Layered Veggie Casserole

I was all set to make this amazing and cozy-sounding dish yesterday after the Bookcase Foodie linked it up over the weekend. But, then I started getting some weird stomach cramps and figured I should stay away from all the dairy...for now, anyway. I will DEFINITELY be making those Yukons in the near future, I already have a bag ready to go!

So then I remembered this other yummy recipe from My Sweet and Savory and realized I had most of the ingredients already in my kitchen. And my dear neighbors were kind enough to share some fresh, homegrown string beans, grape tomatoes, and zucchini from their garden that I was vying to use. My mind was made up.

A great gift from my neighbors :)

All the veggies I used to make this, except for the string beans which I may use tonight

What I came up with is not exactly the same as Sweet and Savory's but it's pretty close and uses the same seasonings. I used Yukon potatoes, onions, garlic, tomato, cauliflower, and zucchini and it was AMAZING! Read on!

Drooling yet?

Layered Veggie Casserole

Ingredients:
(serves 4-6)

2 medium Yukon gold potatoes, thinly sliced
1 zucchini, thinly sliced
6 grape tomatoes, thinly sliced
1 medium Vidalia onion, quartered and sliced
3-4 cloves garlic, minced
1/2 cup cauliflower, chopped and thinly sliced
1/2 cup garlic rice vinegar
1/4 cup olive oil
Salt and pepper to taste
Crumbled feta for topping

Preheat your oven to 400 degrees. Coat an 8x8" square pan or dish with part of the olive oil. Layer the bottom of the pan with the potatoes, then top with some of the garlic, onion, vinegar, salt and pepper. Next, layer the sliced tomatoes, then the zucchini plus more of the onion, garlic, vinegar, salt and pepper. Next, the cauliflower and anymore onion and garlic you might have left, plus the rest of the olive oil and more salt, pepper, and vinegar if desired. Follow the picture below.


Place dish into oven uncovered for 20 minutes. Next, put the dish in the broiler for 3-5 minutes or until roasted to desired blackness. Lastly, top this casserole with as much crumbled feta as you'd like and place back in the turned off oven for 3 minutes until feta is slightly melted. Serve immediately. This would be a great side dish with just about anything or as a main course for a small family or couple. We had it with some steamed broccoli that was about to turn, and it would've been really good with some warm, crusty bread. 

The final product...

The flavors of this dish are so delicious! The tangy vinegar with the hearty garlic, and all those fresh veggies...this is a new favorite recipe of mine, for sure! The saltiness of the feta was an incredible addition, too. You could replace it with mozzarella or goat cheese if you'd like, I think either of those would work well too, but definitely use feta if you got it! I can't wait to serve this at a dinner party!


I am sorry to say my husband was not too into it due to his "delicate" palate (meaning he is not a big fan of onion, zucchini, or tomato, how unfortunate!), but Lily asked for seconds! If you are trying to get your young toddler or child to get into a variety of veggies, this is the way to go. You could also add to or replace the ingredients with any of the following:
  • yellow squash
  • bell peppers
  • other type of potato
  • other type of tomato
  • eggplant
  • carrot
  • mild greens
I'm sure just about anything that is not too bitter tasting would be great in this. I was even thinking about adding some sliced string beans, but opted not to. Perhaps next time...

Lily-approved!

To be honest, I am not a big squash eater. I think I may have mentioned that before, and zucchini is one in particular that I never really got into. But this one fresh from the garden with only a few seeds was so good! Nice and green and crisp-tasting like a cucumber.

Zucchini contains lots of vitamins and minerals, such as vitamins C and K, all the B vitamins, potassium and manganese.  Zucchini also contains large doses of fiber and healthy omegas, and can assist in lowering cholesterol. It is a great diet food!

I hope you give this one a try, you won't regret it! What did you have for Meatless Monday yesterday?

Don't forget I am still looking for the perfect BBQ recipes for my upcoming family cook-out, share yours in the comments! Also, please stop by tomorrow for this month's Up-and-Coming Blog of the Month, which is also a goodbye to a great blog I recently got introduced to. Unfortunately, the writer is not able to keep up with it after this week, but I felt I should honor her blog anyway since it will still be up, just no longer active. 


Enjoy the rest of your day!


Monday, July 23, 2012

Having a Lazy Day....

Well, not exactly LAZY, but too lazy and with too much else to do to post anything good here. Plus, I did not make anything for Meatless Monday over the weekend...but, I will tonight! So, please check back for tomorrow as I will be featuring one of the delicious recipes that was linked up here at Sweet Saturday over the weekend! Could it be yours??? Find out tomorrow!!


Speaking of Sweet Saturday, thanks for the awesome turn-out yet again! And a special thanks to Mary at Mary's Kitchen, our guest-hostess for the weekend, who made it even better. Take a look at her lovely blog if you have not already, she has some really great recipes there!


What did you/are you making for Meatless Monday? Tell me in the comments, and let me know if you'd return here to link-up your MM recipe as I am considering bringing back my Meatless Monday linky if enough interest is expressed....


Have a great day and thanks for stopping by!


Should I bring it back???

Friday, July 20, 2012

Sweet Saturday #14

I have been one busy bee lately, once again. So, I do apologize for not thanking everyone who linked up here recently individually yet, but I will! 


We had lots of great stuff here over the last 2 weeks, and since I have not even had time to do any fun recipes this week, I figured I'd highlight some of the favorites. Everything was awesome though, and I love looking at every single post. 


Here are some tasty recipes and fun crafts, in no particular order...


This cake grabbed my attention as soon as I read "Pina Colada"! Linda at With a Blast always has such fun and creative recipes, this is just one of many :) Thanks, Linda!


PB&J pancakes? Whaaaa??? Oh, yeah, here's the recipe from Holli at Full Hands, Full Heart. Your kids will thank you!


If you've been reading my blog for a while now, you probably know that I am a fan of lemon and lime- especially lemon! And I've had lemon sugar cookies, but this is the first time I've seen lemon and lime combined in a sugar cookie. Genius! Thanks Marly at This and That :)


And now for a fun craft- how darling is this wreath? And so easy to make! Thanks for sharing, Mrs. T Naturally!


I am such a sucker for baby shower favors, and this easy-to-make pacifier corsage is TOO CUTE! I want one just to decorate Lily's room with ;) Thanks, Cluttered Genius! Check out that post for sure, she also has another cute baby shower idea plus a yummy cake recipe!


And last, but certainly not least, check out these super sweet Polar Bear Cupcakes from today's guest hostess, Mary at Mary's Kitchen. How adorable and creative! Bookmark this idea for your next kids party :)


For today's Sweet Saturday, I'd love it if you linked up special BBQ-themed recipes like salads and casseroles in favor of my upcoming family BBQ coming up. If I like your recipe, I'll make it and blog about it later next month! Read here for details: Family BBQ Planning.


OK, now it's your turn! Follow these simple rules:

1. Link up something sweet to really WOW us all- your blog, Etsy store, Pinterest, Facebook, whatever you want! 
2. Link-up as much as you want and please follow me and Mary at Mary's Kitchen. Leave us a comment if you are a new follower so we can follow you back!
3. Hop around and say hi. 
4. Share my button to get more people to join us (not required, but it would be nice!)

Thanks so much for linking up, I really do love Fridays even more because of this :)


Photobucket
<a href="http://jessica-healthymommyhealthybaby.blogspot.com/" target="_blank"><img src="<Photobucket" target="_blank">Photobucket />" alt="Healthy Mommy Healthy Baby" width="125" height="125" /></a>

Wednesday, July 18, 2012

Family BBQ Planning

Every summer my husband's family holds a family BBQ at one of his family member's homes. This year, we decided to host. I know- crazy, right? What was I thinking? I recently held a small Memorial Day BBQ at our home and I was stressed out, tired, and too hot the entire time. Plus, nothing was ready in time for the guests and everyone wanted hamburgers and chips instead of the healthier choices I provided. Lovely.

But, we're going through with it and planning ahead this time. I'm planning to make burgers (turkey and beef), Sangria (alcoholic and non-alcoholic), fruit salad, and some other kind of salad. This is where you, my readers, step in. I want to make something new that will really wow the crowd and appeal to everyone, whether they like to eat healthy or not. Does anyone out there have the perfect family cook-out salad for me to make?

Yes? You do? Then tell me in the comments! Link your recipe below or tell me the recipe. Feel free to email me at healthymommyhealthybaby@gmail.com instead. And, if I choose your recipe, I will blog all about it next month after the big day. I'll be sure to take lots of pretty pictures too and link back to your blog, of course ;)

And, if you don't have a perfect salad recipe but you have a different recipe you think is too awesome not to share, then link that up instead!

So, let the recipe-sharing begin!

Monday, July 16, 2012

Meatless Monday: Hearty Lentils

Yet another busy, fun-filled weekend has passed, and I still have a lot to do to "recuperate" from it, so this will be a quick post. 


Today's Meatless Monday recipe derived from me just using what I had readily available. I had lentils, olive oil and garlic in the pantry, and onion, carrot, and spinach in the fridge, plus some long grain rice. Here's what I came up with:


Hearty Lentils
(serves 6-8)


Ingredients:


1 cup lentils
4 carrots, chopped
1 onion, diced,
4 cloves garlic, diced
1 cup baby spinach, rinsed
2 tbsp olive oil
1 tsp salt
1 tsp pepper
1 tsp dried parsley (you can use fresh)
2 cups rice


Cook the rice according to package and set aside. While it's cooking, sauté onion and garlic in olive oil over medium-low heat in pot for about 3 minutes or until fragrant. Add salt, pepper and parsley and stir together with the onion and garlic, then add the lentils. Cover the lentils with water that is about 1 inch over them, then bring to a boil. Add more water as needed. Once the lentils are about halfway cooked (10-15 minutes), add the carrot. Bring to a boil again, then cover and cook over a high simmer until water is absorbed; add more water as needed. 


Once carrot and lentils are soft yet firm, remove from heat and stir in spinach until wilted. Alternatively, you can add the spinach when the lentils are served so it's still very fresh. Add more seasoning if desired, then serve over rice, or other grain such as quinoa. Quinoa is what I had really wanted to eat with this, but I was fresh out and too lazy to go the store! If you have fresh cilantro, sprinkle that on top. Celery and/or zucchini would make nice additions to this dish as well.


This is an easy, semi-quick meal to make that even meat-eaters will enjoy. Every ingredient is healthy and packed with vitamins and nutrients for your growing child. Most kids like lentils, but if you have a kid who doesn't, make this using only veggies or a different bean they do like. Babies 9 months and up can start eating lentils as long as it is ok by your pediatrician. 


Now, just for fun, I made this little cartoon strip of Lily discovering an ant crawling up her leg. Who says I don't have time for anything fun these days? 


Friday, July 13, 2012

Sweet Saturday #13: Strawberry-Kiwi Lemonade!

Once again, we had a great turn out last Sweet Saturday. Yay! Thanks to everyone who linked up! Let's make it BIGGER this time, ok? I'm officially addicted to having a large turn-out at my link parties now :) ...


Today's recipe was inspired by this tasty-looking treat I came across last week that I just had to try: Strawberry Lemonade from Addicted to Recipes. Mine is a little different because I used less sweetener and added kiwi since I had 2 that were a bit overripe and needing to be eaten. The result came out REALLY GOOD, so I hope you like it enough to try it. Let me know if you do!

What a pretty color, right?
Strawberry-Kiwi Lemonade
(makes 1 pitcher full)

Ingredients:

3-4 lemons
1 cup strawberries
2 kiwis
1/2 cup sugar or 1/3 cup stevia
1 1/2 cup water
1 small aloe leaf
4 cups water

Heat the sugar or stevia with the 1/2 cup of water over medium heat until dissolved, stirring occasionally. Remove from heat once sugar or stevia is completely dissolved and allow to cool. Meanwhile, juice the lemons and set aside. Hull and halve then quarter the strawberries then put into blender with 1 cup if water. 

Strawberries in water
Slice the aloe leaf lengthwise so one side of the leaf exposes the gel. Scoop the gel out and add it to the strawberries and water. Next, add the sugar syrup and hit puree. Lastly, add the lemon juice and water. You can just mix them together with the strawberry concoction if your blender has a "Mix" or "Stir" setting, or just pour everything into a pitcher and stir it up that way.


It will look like this once you blend it all up

And you may have a mess to clean up that looks something like this

You can serve this sweet and refreshing drink with fresh fruit or mint as garnish. Additionally, you could also add some ginger and/or cucumber to the mix, similar to the last lemonade recipe I posted. I recommend allowing to sit your fridge overnight, or at least for a few hours, before serving, to allow the flavors to blend properly. I know my first sip was almost too sour-tasting, but the next morning when I had a glass it was perfect!


This lemonade is particularly healthy and detoxifying with the added benefit of aloe. Aloe is already largely well known for it's cleansing benefits, as well as its soothing benefits when used topically on burns. But, did you know aloe also helps to halt tumor growth, lower blood sugar and cholesterol, prevent kidney stones, and boost cardiovascular performance, among many other things? Read this link to learn more!

This is terrific punch to serve to your family, friends, or at a party. It will be a hit with everyone, especially the kids. Adding the kiwi to this makes me reminisce about the Strawberry-Kiwi flavor Snapple used to make, but this is so much better! Better tasting and better for you ;)

Notice I added aloe gel to this; I use aloe all the time. It's the best burn treatment and can easily be added to any fresh juice of smoothy. But, alone it tastes rather bitter. You can even use it as a moisturizer and to speed up the healing process on cuts and scrapes by apply a little bit right onto the wound. Aloe truly is a wonder plant!

This is how one of my plants looks when the leaves aren't all chopped off. This image is courtesy guide-to-houseplants.com

I will warn you of one thing when consuming aloe, though: it's diuretic, so don't give too much to little ones unless you want them to poop a lot! Just a tip ;)


OK, now it's your turn! Follow these simple rules:

1. Link up something sweet to really WOW us all- your blog, Etsy store, Pinterest, Facebook, whatever you want! 
2. Link-up as much as you want and please follow me if you aren't already, and our guest-hostess, Mary, at A Day in the Life. Leave us a comment if you are a new follower so we can follow you back!
3. Hop around and say hi. 
4. Share my button to get more people to join us (not required, but it would be nice!)


Please show Mary and her lovely blog lots of love, she's new to the blogging scene- plus she has really cute twins for you to ogle!

Thanks so much for linking up, I really do love the weekend even more because of this :)


Photobucket
<a href="http://jessica-healthymommyhealthybaby.blogspot.com/" target="_blank"><img src="<Photobucket" target="_blank">PhotobucketPhotobucket />" alt="Healthy Mommy Healthy Baby" width="125" height="125" /></a>

Wednesday, July 11, 2012

Potty Training Blues

SO, I have been encouraging Lily to use the cute little potty I got her every since she was about 18 months old, figuring the sooner the better, right? And by starting that early, I wasn't expecting her to use it right away, I just wanted her to get familiar with it and know what it was. I got her 2 cute potty books and let her put some stickers on it and even happily watched her put her Winnie the Pooh on it when he had to go. 

Recently, when she was around 24 months, she started actually voluntarily sitting on it and even making grunting sounds to try and get herself to go. She'd even look and see if she made anything, and I thought things were going pretty well. I even got her some cute pink pull-up diapers to make practicing potty time easier. 

Then one day this past May, she finally went! Yay! I couldn't be more excited. And, I knew this didn't mean she was going to go on her potty every time from now on, but it was a big step towards her (and my) potty-trained goal. She kept practicing happily for a few weeks after that with little issue, but then all of a sudden a couple weeks ago she has now been nothing but resistant to using her potty.

Boo. I am REALLY sick of buying and changing diapers!!!

So, I tried singing a song to get her to try the potty. She screamed. I tried showing her how her dolly liked to use it. She would put dolly on, but not herself. I would, and still do, encourage her to go on every chance I get. She still defies me and her potty.

So, today I am reaching out to my mommy community asking for advice: how did you potty train your kids? Or what are you doing now to train them that seems to be working? 

I have been told repeatedly that when they're ready, they're ready, and you have to just be patient. And I am being patient; it's not like I'm punishing her or getting mad at her for not trying. Although, the other day she peed on the floor right after getting out of her bath, and after I had asked her if she needed to go potty, I got a little pissy and told her how big girls go on the potty and she needed to remember to tell mommy when she had to go.

So, I'm thinking of trying the bribery method that my mom used on me using fruit snacks as her "reward", but I really do not want to do that. I don't want her to expect a treat just for doing what's right. What can I do instead?

My most recent modus operandi was to decorate Lily's potty with stickers to hopefully make it look more appealing to her. When she first saw it, she made "ooo" and "ahh" sounds like she normally does when she likes something, but she still wouldn't sit on it. I kept trying, and yesterday I did get her on it, but perhaps the new Little Mermaid doll I gave her helped keep in her a good enough mood to attempt such a feat :)


Perhaps this is the beginning of progress in the potty-training department? I certainly hope so! Only time will tell...

But, until then, please share your advice or stories in the comments below, thanks a lot!!! Wish us luck! (just for the record, Lily is now 2 years and 4 months old).

Monday, July 9, 2012

Meatless Monday: Southwestern-style Corn Fritters

I hope nobody out there melted from the intense heat over the weekend. I know it left me swimming in sweat and utterly lacking motivation. I did, however, manage to make a new variation of my corn fritters using black beans and tomato which came out really good, and a perfect summer, poolside treat.

If you didn't catch the first post I did on corn fritters, click here. This time I happened to have a bag of a frozen veggie medley containing corn, red and green bell peppers, tomato, onion and black beans, which is why I decided to use it for this purpose. Although they came out yummy and all got eaten up by Paul, Lily and I, I still honestly think my original Zesty Corn Fritters recipe is my favorite fritter concoction so far. 

This version uses classic southwestern ingredients and scallions fresh from my garden. Yes, finally got my herb garden going thanks to Paul! We also have lots of lovely flowers sprouting up to as you can see...


Southwestern-style Corn Fritters
(makes about 1 dozen fritters)

Ingredients
(please note: I used a bag of frozen mixed veggies, but this recipe is written as if using the ingredients fresh

1 14 oz package frozen corn defrosted, or fresh corn from 3-4 ears
1 medium green bell pepper, diced
1 medium red bell pepper, diced
1 medium tomato, diced
1/2 cup cooked black beans
1/2 cup chopped scallion
4 cloves garlic, minced
1 lime, juiced
2 large eggs, slightly beaten
1 cup flour
1 tsp chili powder
1 tsp cumin
1/2 tsp baking powder
1/2 tsp salt
1/2 tsp pepper
1/2 cup water (plus extra if needed) 
Apprx. 1 cup oil for frying (canola, grapeseed or vegetable)

In a large bowl, mix flour, seasonings and baking powder together in bowl, then beat in the eggs, lime and water. Stir until smooth, then add all other ingredients except for the oil. If mixture looks too wet, add a little more flour; if it looks too dry, add a little more water. It should basically look like pancake batter with chunks of veggies in it. 

Heat oil in a large frying pan over medium-high heat. Once oil is hot enough (simmering and smoking, but not boiling), drop spoonfuls of the fritter batter into pan like in the picture below.

Fry for 2-3 minutes on each side, or until golden brown. Remove from pan with a spatula and set on paper toweled plate or cookie sheets. Allow to cool for at least 5 minutes before serving.


I made a little salad to go with them using these ingredients 

Mommy's and Daddy's

Lily's
  
YUM.

These tasty veggie cakes are full of vitamin C, B vitamins, fiber, iron and protein. Using a healthy oil like canola or grapeseed helps to keep carcinogens at bay. Pairing them with a fresh salad or soup makes a perfect light lunch or dinner. Kids will love them, too, guaranteed! They're also super easy to make and your little one can even help with put the ingredients into the bowl and mixing them.
 
This may surprise you, but scallions are actually good for you. I always used to think they were just a simple herb that gave a nice tangy onion flavor to many tasty dishes, but they also contain a fair amount of vitamin K, fiber, healthy fatty acids, and are even found to be anti-cancerous. They are easy to plant and grown, and cheap! In fact, after Paul planted them, we forgot about them until they suddenly popped up in our garden, blessing us with an abundance of zesty chive goodness.
 
Planting herbs is easy to do and to maintain. Most herbs don't need much tending, just enough sunlight and water. Plus, fresh herbs always taste way better than dried. The issue I've always had with buying fresh herbs at the supermarket is that I'm always forced to buy a huge bunch that I know I will never use up in time, and I never do, causing most of what I buy to go to waste. Luckily, we have now been blessed with plenty of land to grow a garden on, but if you don't have your own plot, an Aerogarden is a great way to grow your own plants in doors. You could probably also easily find DIY herb garden set-up instructions by doing a Google search, like this one.

Have a happy and healthy Meatless Monday!
 

Friday, July 6, 2012

Sweet Saturday #12

I hope everyone enjoyed their 4th of July this week! We went to a family BBQ and then walked over to a local park for fireworks (Lily was more interested in the playground!). Unfortunately, I didn't take any pictures because I was having more fun just being in the moment, but here's a cute pic of Lily I wanted to share anyway:


She was just recently introduced to Playdough and she loves it!


Now, let me just say how beyond pleased I am at the turn-out of linkers we had last week. I had the most bloggers link-up here than ever before. Thanks to all who joined us and a special thanks to Elise at I Heart Pears for co-hostessing!


There were so many sweet recipes, craft ideas, activities and more here last Saturday, I decided to share a few of my favorites again. 

Without further ado...


These cute little caterpillars inspired by The Hungry, Hungry Caterpillar book by Eric Carle really caught my eye. How adorable! Jen has lots of other nifty craft ideas at her blog, Experiment MOM, so check her out. Thanks for sharing, Jen!


With it being the 4th this week and all, I was happy to see a few patriotically-inspired crafts get linked up, including this lovely red-white-and-blue tulle wreath. Thanks, Kayla, at She's Freaking Crafty!


I found this adorable chimney sweep irresistible and just had to share this original idea from Pinkoddy's Blog.


And last but not least, these tasty frozen treats from our co-hostess today, Holli at Full Hands Full Hearts, are not only yummy but healthy too- and easy to make! Thanks, Holli! She's kind of new to the blogging scene, so be sure to show her extra love at her beautiful blog!


OK, now it's your turn! Follow these simple rules:

1. Link up something sweet to really WOW us all- your blog, Etsy store, Pinterest, Facebook, whatever you want! 
2. Link-up as much as you want and please follow me and Holli at Full Hands, Full Heart. Leave us a comment if you are a new follower so we can follow you back!
3. Hop around and say hi. 
4. Share my button to get more people to join us (not required, but it would be nice!)

Thanks so much for linking up, I really do love Fridays even more because of this :)


Photobucket
<a href="http://jessica-healthymommyhealthybaby.blogspot.com/" target="_blank"><img src="<Photobucket" target="_blank">Photobucket />" alt="Healthy Mommy Healthy Baby" width="125" height="125" /></a>


Lily's 4th of July art projects from her daycare!


P.S. If you are a new follower from last week and I did not visit your blog yet, please let me know! Sometimes I get too busy and don't get to check all my blog stats, so feel free to remind me and I will be more than happy to visit you and follow back ! 

Related Posts Plugin for WordPress, Blogger...